Published December 27, 2018

Remote Control Cloud-Enabled Christmas Tree Lights
To control tree lights remotely, we set up a cellular data connection for maximum flexibility and uptime.
Things used in this project
Hardware components

|
Raspberry Pi Zero Wireless | × 1 |

|
SORACOM Air Global IoT SIM | × 1 |
Software apps and online services

|
SORACOM Air IoT Connectivity Platform | × 1 |

|
SORACOM Beam - Data Transfer Support | × 1 |
Story
 Christmas is a time for connection, and since we’re always looking for ways to connect we sat down with our friends at Station Fand FOCUS x UsineIOto come up with some new IoT use cases for the holiday. First up, the IoT Christmas Tree!
The classic Christmas tree string light is a perfect candidate for a simple IoT project, and we know a lot of maker types are already programming LED strips for fun and festive holiday displays. We’ll want to control our tree display remotely, so we’ll set up a cellular data connection for maximum flexibility and uptime.

Cellular connectivity enables data exchange both to and from connected devices, which lets us put together a hardware solution that can be programmed and connected anywhere (from the North Pole to Grandmother’s House — and grandmother can do it herself!) and remotely controlled to perform fun actions on holiday light strings.
For this project, we’re using the following hardware:
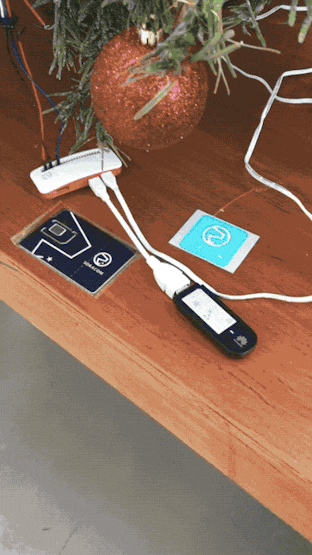
Raspberry Pi Zero W Kit (,)3G Dongle ()Soracom SIM ()WS2812 / WS2811 LEDs Strip (,)Breadboard wires (,)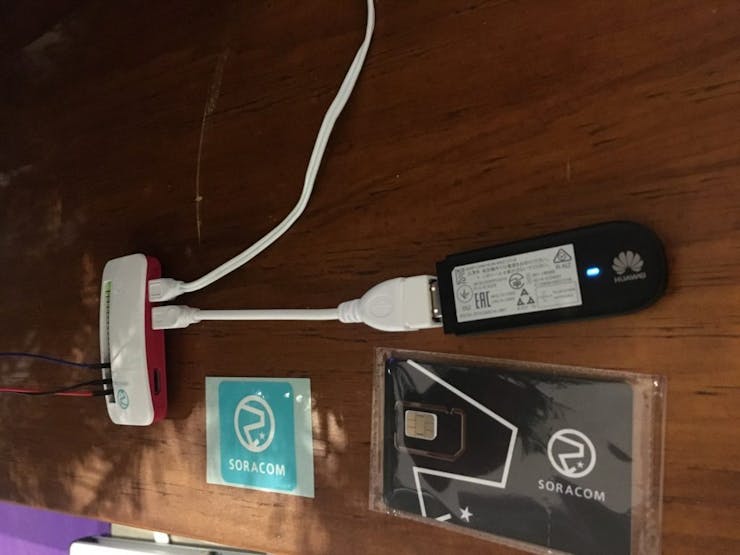
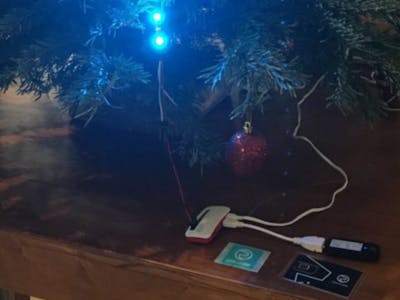
First, we’ll configure our Raspberry Pi Zero to connect using cellular data and set up our Soracom cellular connectivity service to enable communication.
Tutorials for both steps are available on Github as part of the Soracom IoT workshop Series (US,FR,UK):For demo purposes, we’re using a test MQTT broker. Obviously you’ll want to use your own broker for anything you take into production.
Once the base setup has been done, we can move on to the fun part: wiring up our WS281x LED strip. The strip requires 5v Power, and a Raspberry Pi Zero will be able to supply enough power for 30 LEDs (about one meter).

In our case, we’ve wired the WS281x as follows:
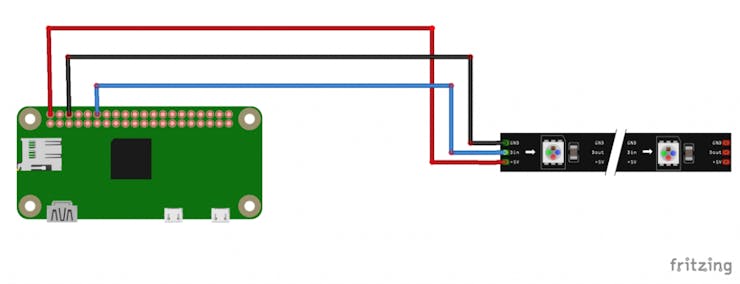 Obviously one meter of holiday lights won’t look very festive on a larger tree, so for maximum effect you’ll want to use an external 5V power supply. Not a problem! Just make sure there’s a common ground and control cable between your Raspberry Pi and your LED strip. You can find sample wiring here(Arduino-based but you get the idea).
Once wiring is complete, we can get to coding. For this project, we chose MQTT because it’s both convenient and secure for sharing instructions with your devices. Additionally, Soracom’s Beam functionality will save us some bandwidth usage by converting MQTT to MQTTs while maintaining end-to-end security.
We settled on NodeJS since both the NPM rpi-ws281x-nativeand MQTTlibraries are already available to control WS281x LEDs strips and connect to a MQTT broker. On Raspbian for Raspberry Pi Zero, you can install NodeJS as follows:cd ~wget http://nodejs.org/dist/v8.4.0/node-v8.4.0-linux-armv6l.tar.gzcd /usr/localsudo tar xzvf ~/node-v8.4.0-linux-armv6l.tar.gz --strip=1sudo apt-get remove --purge npm node nodejssudo npm install -g npmcd ~rm node-v8.4.0-linux-armv6l.tar.gz Once NodeJS has been installed, you can get the sample code from our Github project at https://github.com/alexissusset/soracom-xmas-ws2811/From the same directory, install and start the code as follows:
npm installnode app.jsThe App will give you the IMSI for your SIM card, which you can then use to send commands. The application watches for commands on:
xmas/ The commands below will let you switch between different LED animations. We like MQTT.fxfor this, since it’s a good MQTT client that runs on Windows, OS X and Linux:ON (default mode, brightness rotation with Soracom colours)SORA (Same as default mode, brightness rotation with Soracom colours)USINEIO (Animation and brightness rotation with UsineIO colours)ANIME (Animation of different coulours)IF (Iteration with coloured strip)IT (Iteration with additional LEDs off)BR (brightness rotation)OFF (Switches off the LEDs Strip, great when forgetting to switch things off before leaving)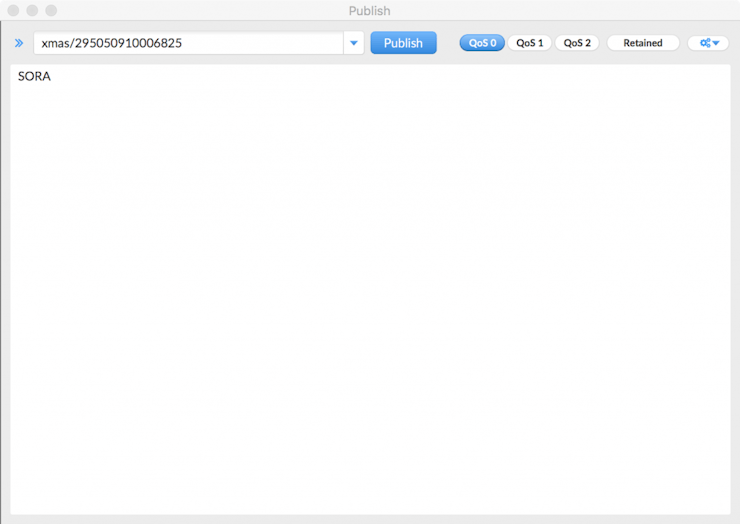
That’s it! You now have a Cellular connected Xmas tree