Big Brother @ Home – Wireless AI Security System
Things used in this project
Hardware components

|
Raspberry Pi Zero Wireless | × 1 |

|
Camera Module V2 | × 1 |

|
SORACOM Air Global IoT SIM | × 1 |
| Huawei MS2131i-8 3G IoT Global 3G USB Dongle | × 1 | |
| 5v DC stepper motor with ULN2003 controller (optional) | × 1 | |
| PL2303 USB UART Cable | × 1 |
Software apps and online services

|
OpenCV | × 1 |

|
Raspbian | × 1 |
| Linux v5.1 kernel | × 1 | |

|
SMS Messaging API | × 1 |
Hand tools and fabrication machines

|
3D Printer (generic) | × 1 |
Story
The latest advances in AI have allowed computers to recognize faces and objects with a phenomenal degree of certainty. The silicon to support these technologies has dropped in price to just a few dollars while performing on par with systems that cost millions of dollars just a few years ago.
We took on the challenge of re-tasking a $5 Raspberry Pi Zero W computer-on-a-stick and a $25 Pi Camera using the latest software platforms available to create an intelligent security system that recognizes people in front of the camera and notifies the owner via SMS text messages or email.
When a suspicious person is detected, the system sends an immediate notification to your smartphone over a cellular modem.
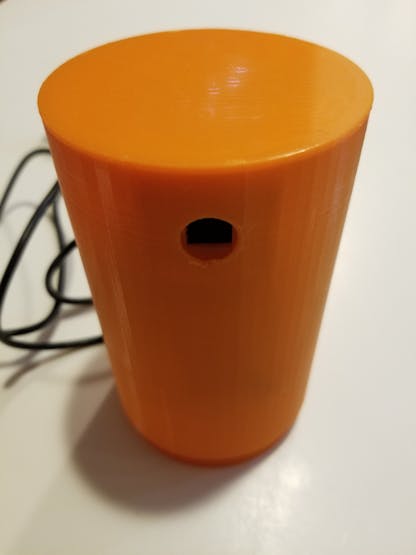
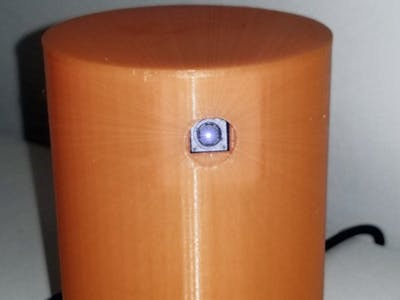
A 3D-printed case design for the components puts everything into a compact and unobtrusive cylinder that can be placed inconspicuously around your home or office.
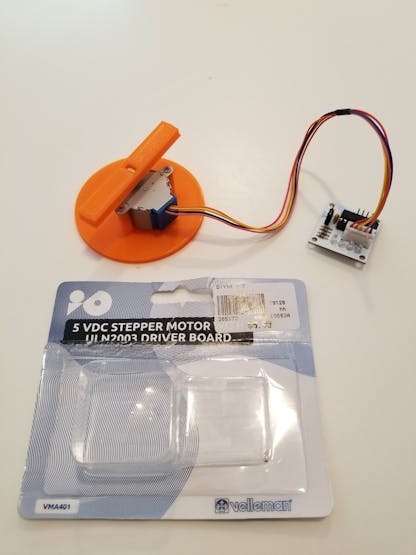
Stepper Motor Base (optional)
For the ambitious, we added an optional stepper motor mounted on a 3D-printed base controlled by the Pi Zero that can spin the housing to expand the camera view. This could prove useful after receiving a notification when remotely viewing the camera stream to see what is currently out of view. This component is optional.
Pi 3 Model B+ Development System (optional)
Because development on the Pi Zero is painfully slow, we opted to move the SD card from the Pi Zero to its faster, bigger brother, the Pi 3 model B+. This sped up compile time considerably. Note that you must configure the components while the SD card is running on the Pi Zero and then move it to the Pi 3 for compilation.

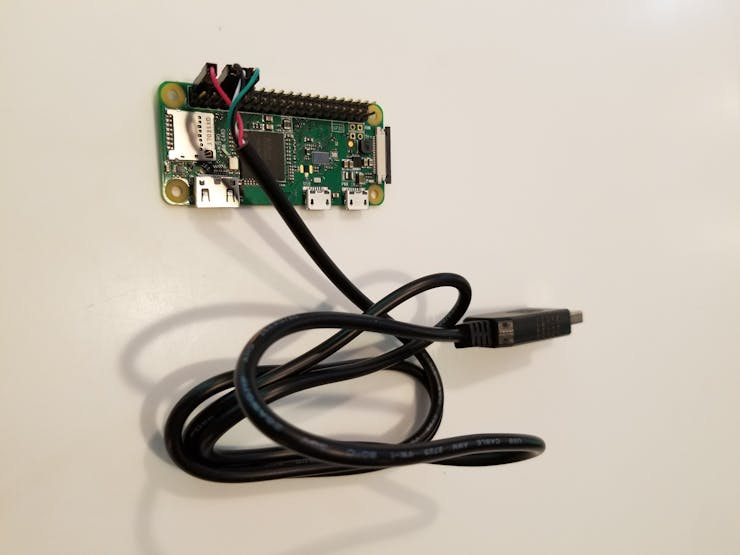
PL2303 Serial Console Cable (optional)
A serial console is by far easier to use than logging in via SSH. A PL2303 USB UART cable is highly recommended and can be found as cheap as $1 on eBay. The version we listed is available from Amazon for a higher cost but will arrive more quickly. You can get by without one, but we don't recommend it.
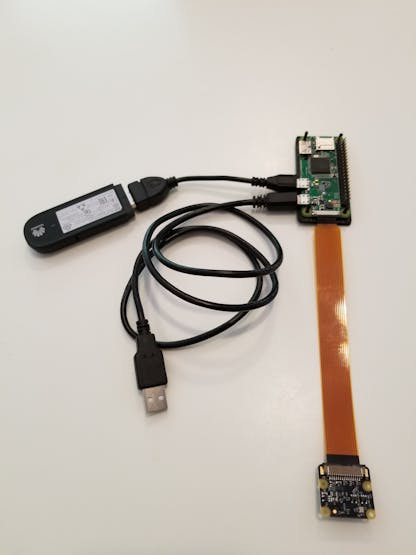
Plug the cable into the Pi Zero W as shown in the picture below. Note that you must edit a file in the Raspbian SD card image to activate the Linux serial console.
Edit the file /boot/config.txt and add the following line to the end of the file:
enable_uart=1Or you can login to the Pi over an SSH connection, run raspi-config, and enable the serial console from the menu option.
3D-Printed Case
We designed a simple, unobtrusive 3D-printed case for the components. The case contains mounts for the Pi Zero W, Huawei modem, and Pi camera. Use the link below to find the 3D-printed components on Thingiverse.
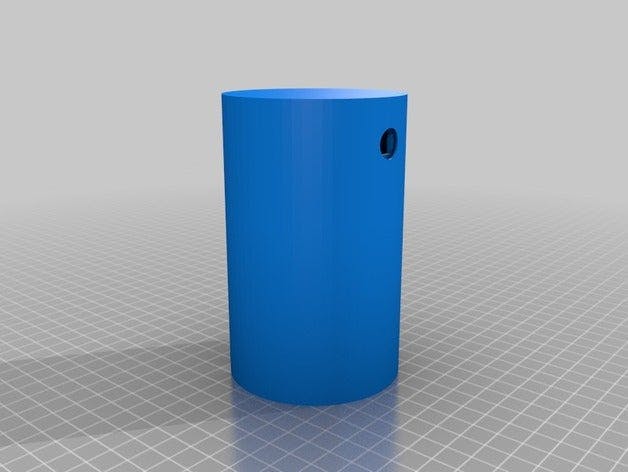 https://www.thingiverse.com/thing:3667064
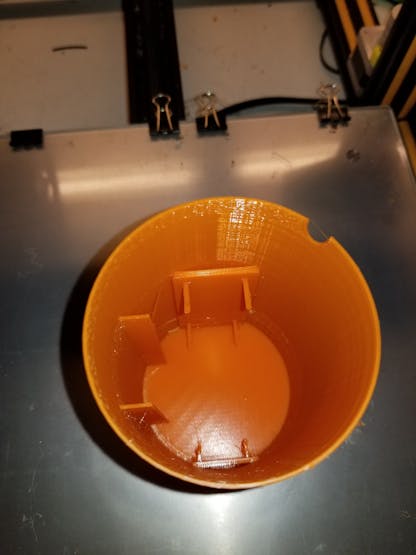
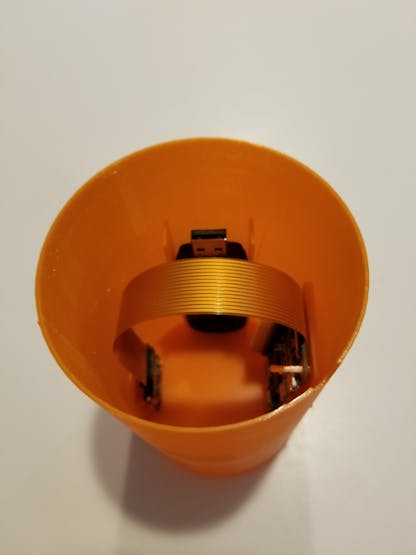
After creating the SD card and populating with the required packages and software, place the components in the 3D-printed case. The USB cables will be tight but fit with careful persuasion.
Installing OpenCV with OpenCL on the Pi Zero
The Pi Zero is inexpensive but not powerful enough to run OpenCV and recognize objects without some help. Fortunately the Pi Zero's GPU, the Videocore IV or VC4, is powerful enough to do the job. OpenCL has been ported to the VC4 and OpenCV will take advantage of OpenCL if it finds it available.
Because the Pi Zero is quite slow, we will configure the software on the Zero, but we recommend compiling it on its bigger brother, the Pi 3 Model B+.
1) Download the Raspbian Stretch Lite OS and install it on a 16GB or larger SD card - https://www.raspberrypi.org/downloads/raspbian/2) Install OpenCL for the VC4 by following the instructions at https://github.com/doe300/VC4CL/wiki/How-to-getNote: after compiling and installing OpenCL, test that it is working by running the command "clinfo" from the Pi Zero prompt.
3) Install gcc v9.1 from https://solarianprogrammer.com/2017/12/08/raspberry-pi-raspbian-install-gcc-compile-cpp-17-programs/ and follow the instructions to set it up.4) Install OpenCV from https://github.com/opencv/opencv/archive/4.1.0.zip.Unzip the file to /usr/src. Change directory to the opencv source code directory. Make a sub-directory called build. Change directory to the build directory.
We will configure the build on the Pi Zero by running the following from the /usr/src/opencv-4.1/build directory.
VERBOSE=1 sudo cmake -D CMAKE_BUILD_TYPE=RELEASE \ -D CMAKE_INSTALL_PREFIX=/usr/local \ -D INSTALL_PYTHON_EXAMPLES=OFF \ -D INSTALL_C_EXAMPLES=OFF \ -D BUILD_PERF_TESTS=OFF \ -D BUILD_TESTS=OFF \ -D OPENCV_EXTRA_MODULES_PATH=/usr/src/opencv_contrib/modules \ -D ENABLE_PRECOMPILED_HEADERS=OFF \ -D BUILD_EXAMPLES=OFF \ -D OPENCV_ENABLE_NONFREE=ON \ -D FORCE_VTK=ON ..This will take some time to configure on the Zero. Once the configuration process is complete, powerdown your Zero and move the SD card to your Pi 3. Change to the /use/src/opencv/build directory and run 'make -j4; make install'. Sit back and relax as this will take some time.
We also recommend enabling zram compressed swap while compiling as described -> here.OpenCV Code & Training
There is a great tutorial with Python examples that teaches how to set up and train OpenCV to detect human beings -> here. We adapted this code and added the ability to send text messages.Soracom Modem & SIM Card
Follow the instructions -> here to set up the Soracom modem for Internet access. Soracom provides a script that does everything for you.Twilio
We set up an account on Twilio and used their Python API to add the option to send SMS text messages.
Or if you prefer email, leave the system setup as default and edit the "your@email_address.com" field in the conf.json file to your email address.Stepper Motor Option
To add the stepper motor option, 3D print the motor base and pivot. Use two M2 or M3 screws to hold the motor firmly to the base and push the pivot arm onto the motor rotor.
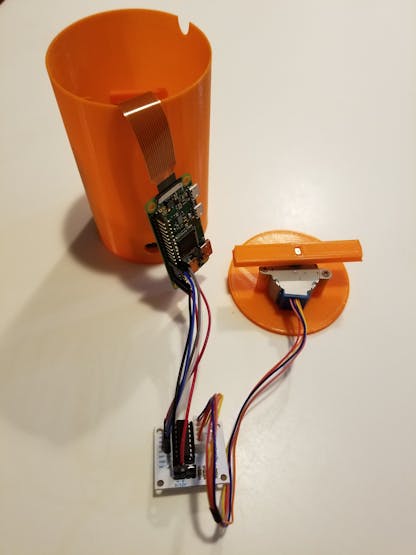
Follow the instructions below to wire up the stepper controller to the Pi Zero W.
Make sure the +V line is connected to the Pi Zero W pin #2 and the Gnd line is connected to the Pi Zero W pin #6.
https://peppe8o.com/2019/04/control-a-simple-stepper-motor-with-a-raspberry-pi/